If you use SolidWorks and 3D print with Bambu Studio or PrusaSlicer, this tip will save you a ton of time!
This guide will walk you through creating a macro that exports your active SolidWorks part as a STEP file and automatically opens it in Bambu Studio with one click.
I’ll also share another macro that generates both STEP and STL files at the push of a button!

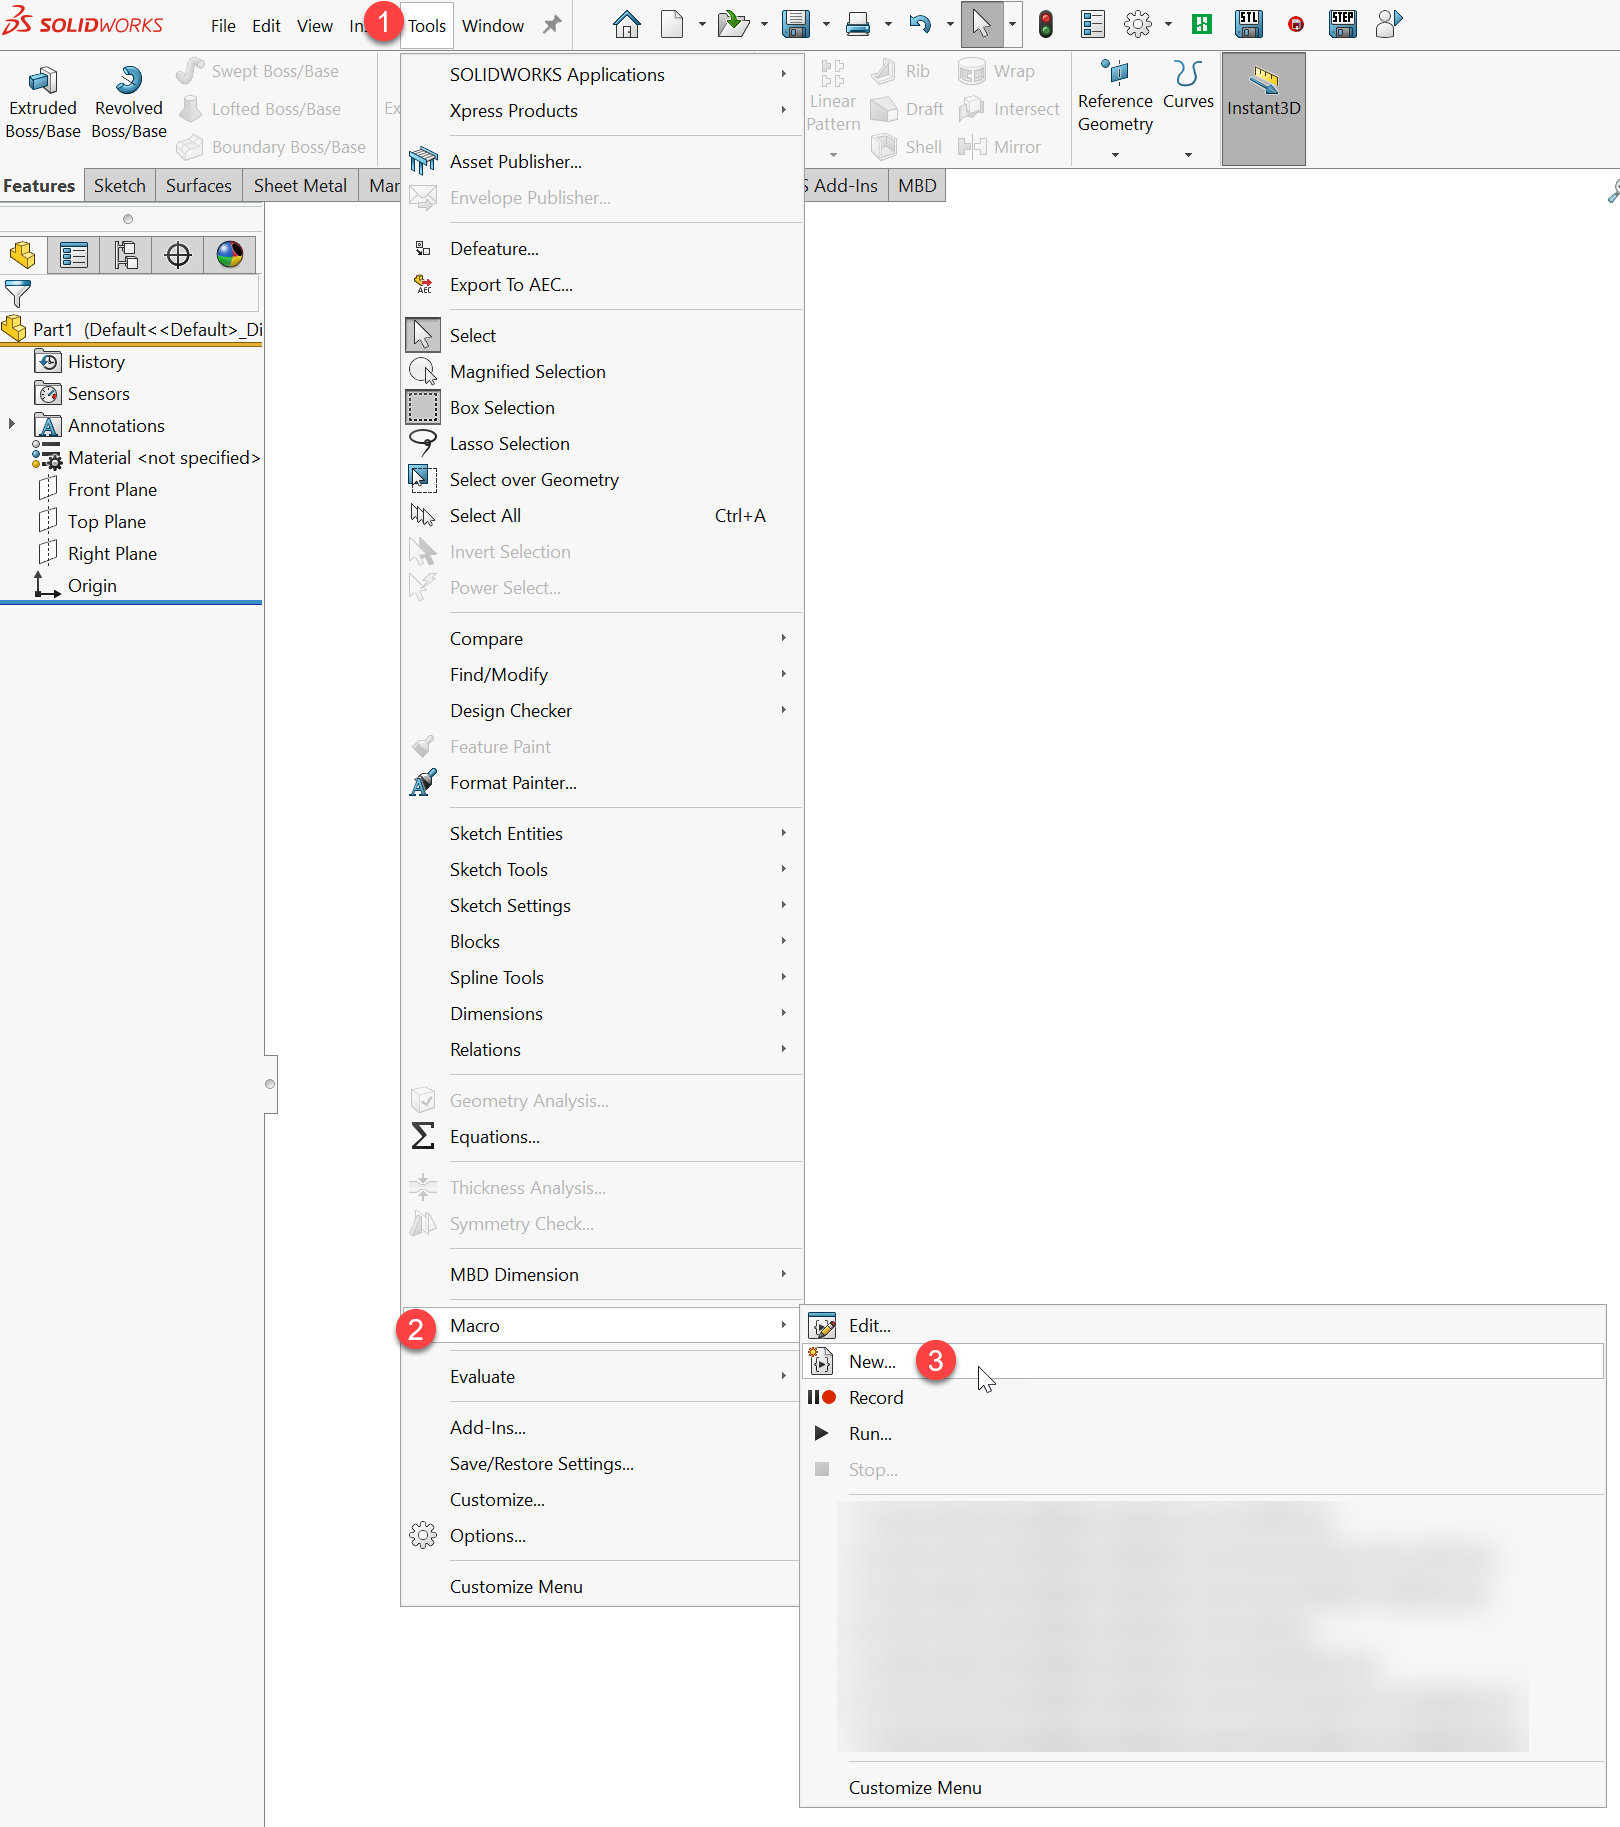
Here are the steps to create new macro.
Here is the code below:
– change line 14 with your path
– line 38/39 is if you want STEP or STL
– line 48 is where on your computer bambu slicer is located!
' There is 2 path you need to change for your computer. One is where the STL is save and the other is where is prusa slicer located on computer
'https://forum.simplify3d.com/viewtopic.php?t=8332

Dim swApp As SldWorks.SldWorks
Dim Part As ModelDoc2
Dim result As Long


Sub main()
    Dim Path As String


    ' SET YOUR STL OUTPUT PATH
    Path = "C:\Users\robom\Downloads\STL\" ' This is where all the files will be saved

    Set swApp = Application.SldWorks

    Set Part = swApp.ActiveDoc
    If Part Is Nothing Then Exit Sub


    If Part.GetType = swDocDRAWING Then
        Exit Sub
    End If

    Dim Extension As String
    Dim PartName As String
    PartName = Part.GetTitle

    If InStr(PartName, ".SLDPRT") = 0 Then
        MsgBox "Save part first"
        Exit Sub
    End If

    Call SelectAll(Part)

    Extension = Mid(PartName, InStrRev(PartName, "."))
    PartName = Replace(PartName, Extension, ".step")    ' step files provides better resolution
    ' PartName = Replace(PartName, Extension, ".stl")   ' if you want to export STL files, remove the '
    Path = Path & PartName
    result = Part.SaveAs3(Path, 0, 0)
     Call open_s3d(Chr(&H22) & Path & Chr(&H22))
End Sub

 Sub open_s3d(stlPath As String)
    Dim sFullPathToExecutable As String
    ' sFullPathToExecutable = "C:\Program Files\Prusa3D\PrusaSlicer\prusa-slicer.exe" & Chr(&H20) & stlPath
     sFullPathToExecutable = "C:\Program Files\Bambu Studio\bambu-studio.exe" & Chr(&H20) & stlPath

      Shell sFullPathToExecutable
End Sub

Sub SelectAll(swModel As SldWorks.ModelDoc2)

    ' Select all edges in the part,
    swModel.Extension.SelectAll
End Sub
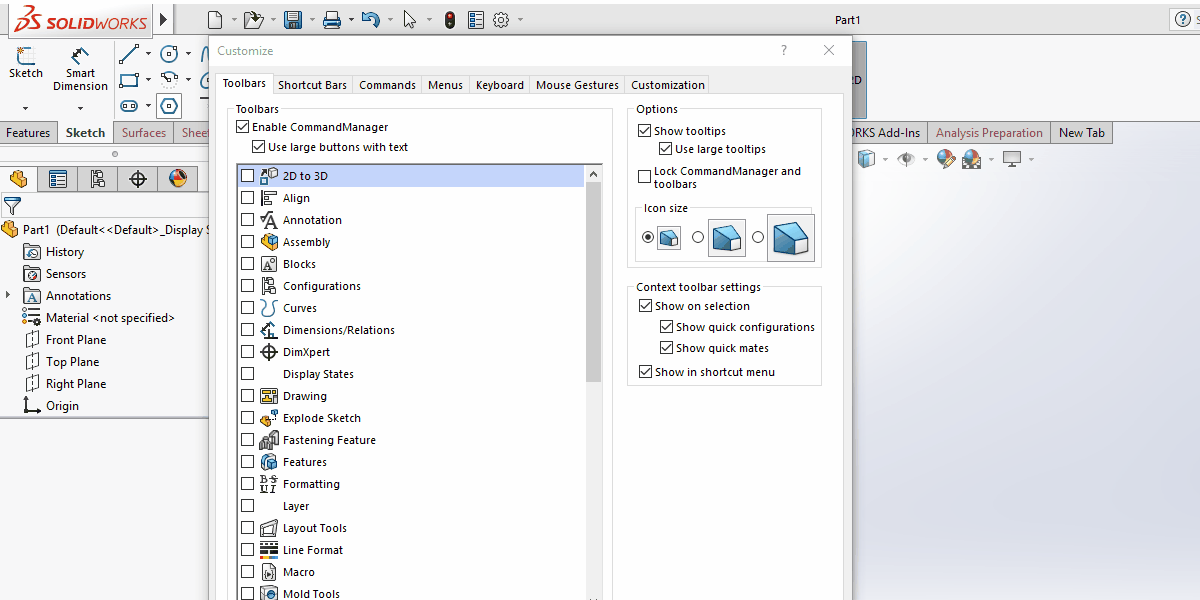
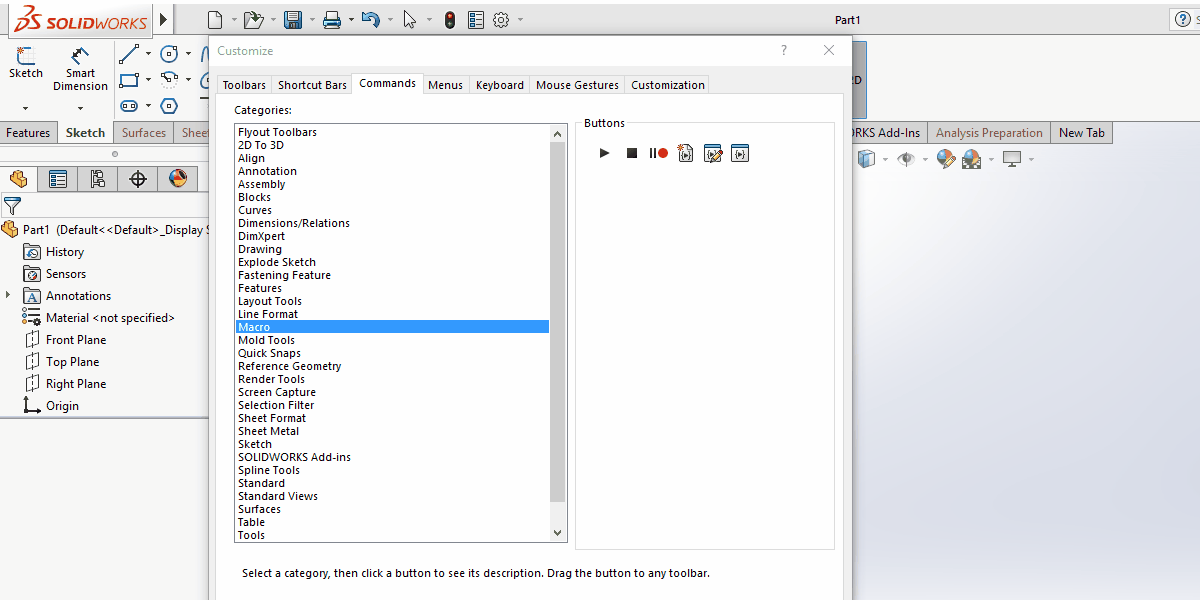
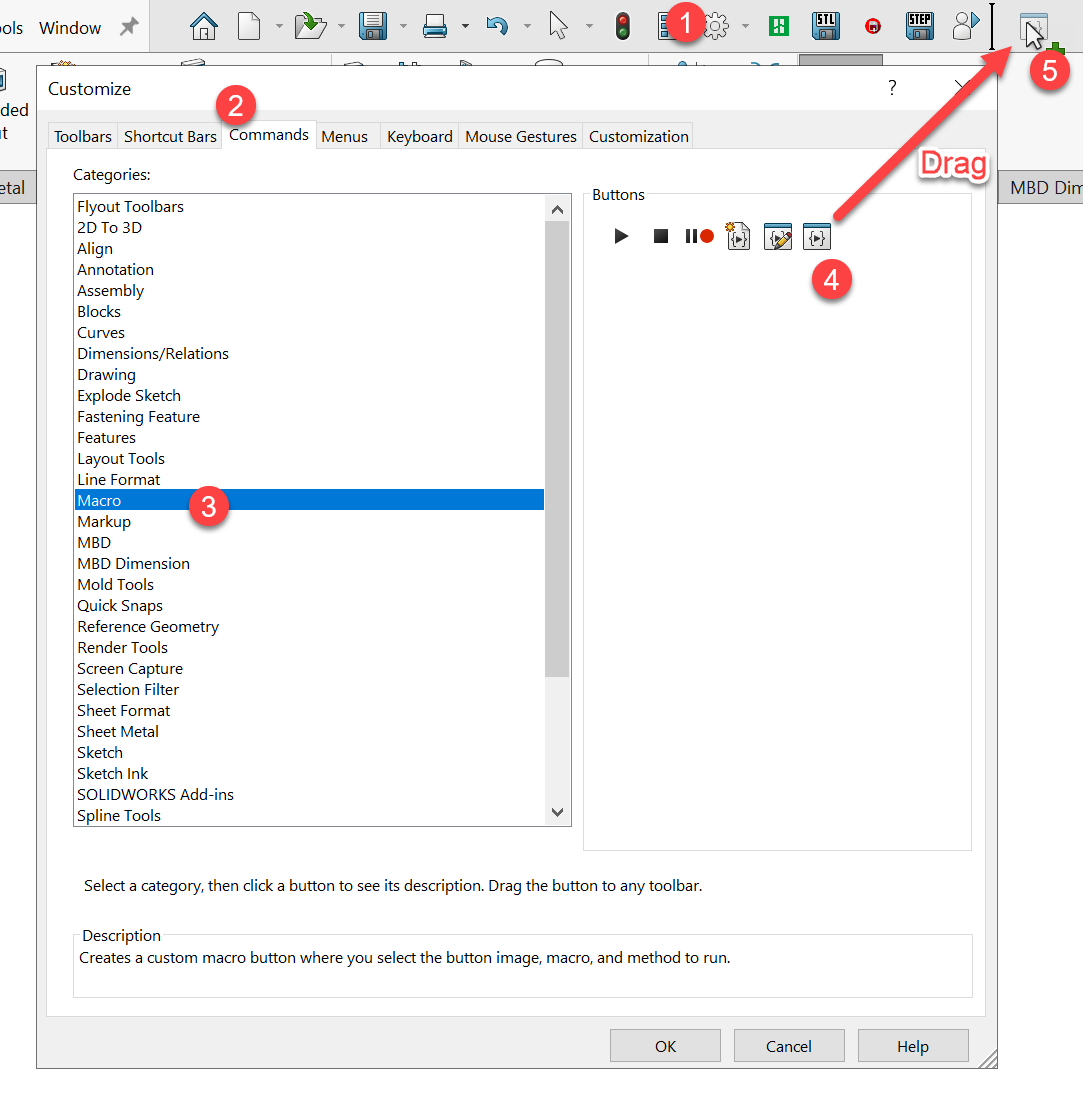
Here are the steps to add an icon at the top of your toolbar
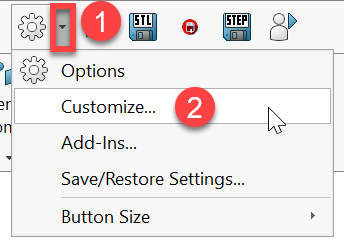
step 1- select option (the gear icon) the customize
step 2 – select Commands
step 3 – select Macro
step 4 – drag and drop the icon to menu bar item 5
This pop up will open
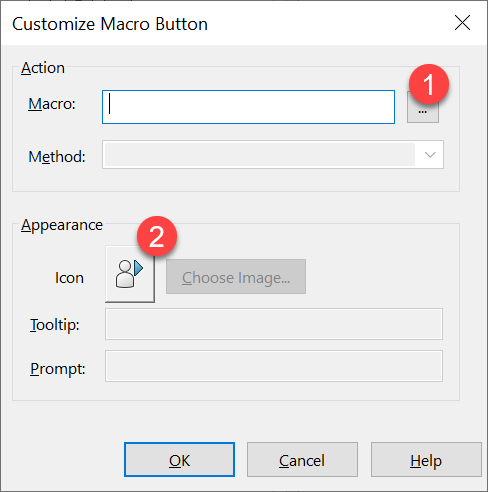
step 1- select the 3 dots […] and select the .swp code from above
step 2 – select image for the icon
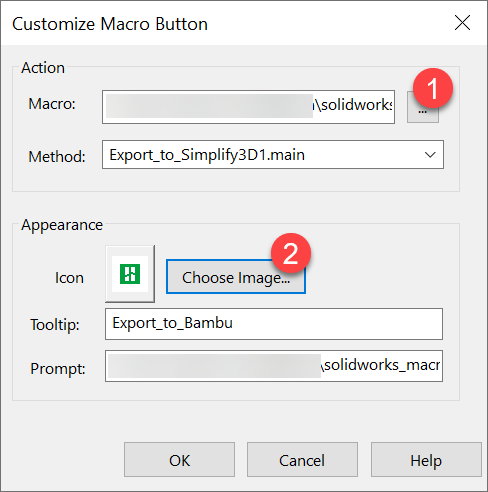
Here are the icons I made, right click and save as.


if you get stuck or have issue with the code, you can ask ChatGPT to help out.
Here is the macro to generate a STEP file and after you click the button it save the path where the file is saved in your clipboard, you just need to do “Ctrl+V” in explorer to get the part fast!
' ******************************************************************************
' C:\DOCUME~1\Gregor\LOCALS~1\Temp\swx4540\Macro1.swb - macro recorded on 10/24/09 by Gregor
' ******************************************************************************

Sub main()

Dim swApp As Object
Dim Part As Object
Dim FilePath As String
Dim PathSize As Long
Dim PathNoExtention As String
Dim NewFilePath As String
Dim ConfigName As String
Dim ClipBoard As New MSForms.DataObject

Dim MyPath                      As String
Dim MyFolder                    As String

Set swApp = Application.SldWorks
Set Part = swApp.ActiveDoc

FilePath = Part.GetPathName ' Get the full path of the part/assembly file
PathSize = Strings.Len(FilePath) ' Get the length of the full path
PathNoExtention = Strings.Left(FilePath, PathSize - 6) ' Truncate the last 7 characters
NewFilePath = PathNoExtention & "STEP" ' full path name with .step in it. Build the new path with file name and extension

Part.SaveAs2 NewFilePath, 0, True, False

'this is JUST the path name of the folder
'https://forum.solidworks.com/thread/65304
MyFolder = CurDir$
MyPath = Left(Part.GetPathName, InStrRev(Part.GetPathName, "\") - 1)

'Copy full path to clipboard
'ref: https://forum.solidworks.com/thread/200259
  ClipBoard.SetText MyPath
  ClipBoard.PutInClipboard

End Sub
While doing this tutorial, I just notice that Jerome from the past did animated GIF of the steps to do this in 2021!